RGB.jpg)
Oliver's Blog 2017
December 8, 2017
In my sincere effort to make each mandolin better than the last, I am constantly thinking about ways in which I can improve my mandolins. Sometimes I think about a better process, sometimes it's better materials as in the case of the varnish and sometimes it's about improvements in design in order to refine my sound even further.
During my sabbatical from mandolin making, I had a lot of time to just think about what I might do differently to improve my sound if I had the chance. When I was fortunate enough to have that chance, the result was what The late Pete Kuykendall termed "Apitius 2.0". A new generation of Apitius mandolins, markedly different then the ones that had preceded them. Outwardly, they have a look much more closely resembling the Loar period mandolins and inwardly, they have more than a few innovations which I developed to refine what is possible in the sound of an arch top mandolin. My aim is to take the F-style mandolin, metaphorically, from a good Heintzman upright to sounding like a Bösendorfer grand piano!
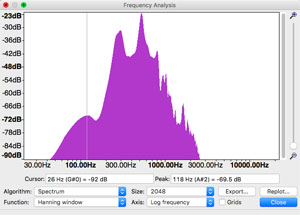
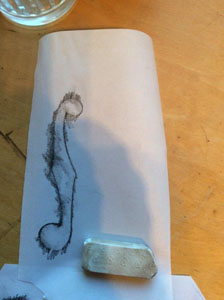
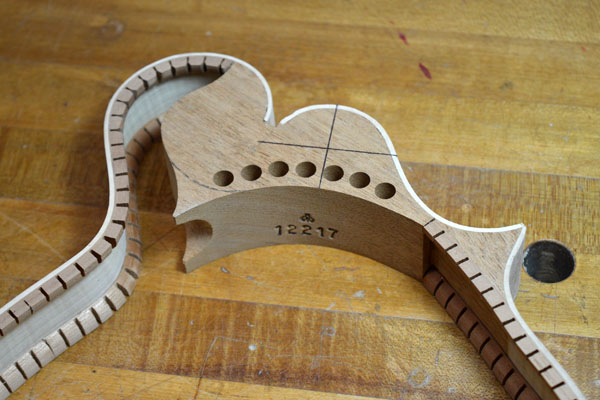
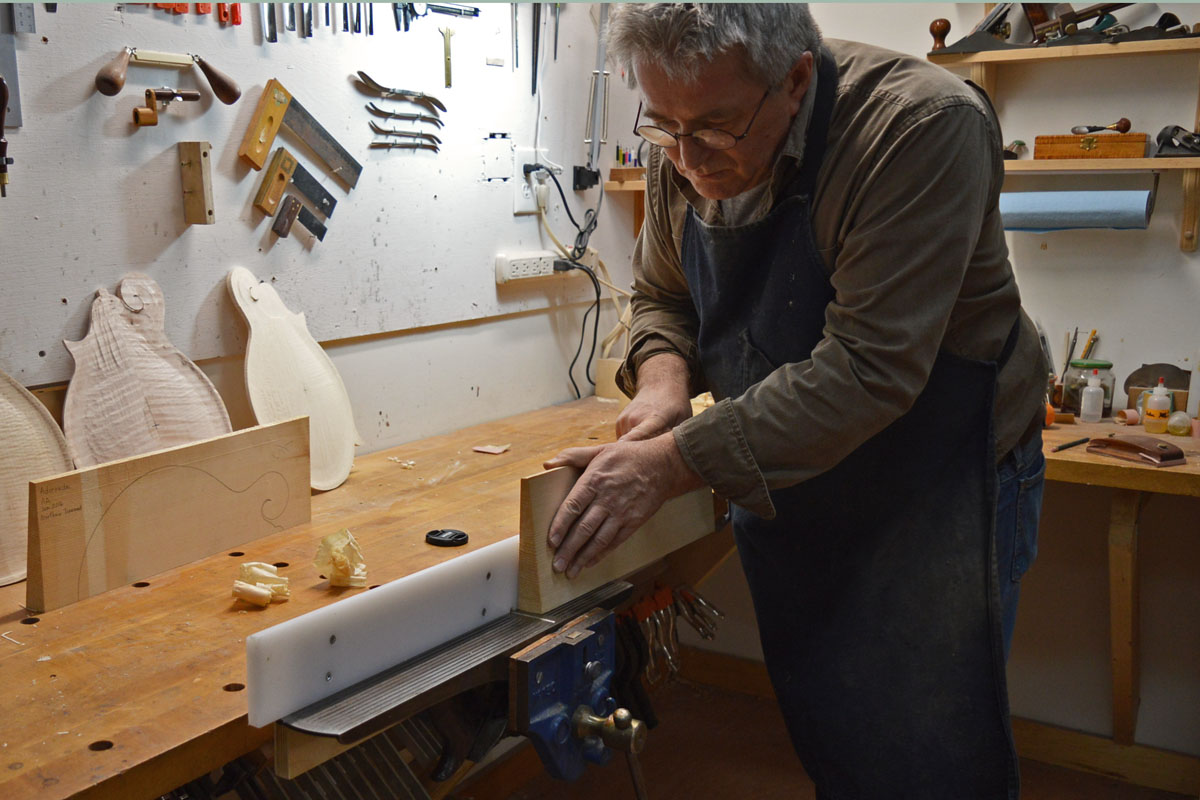
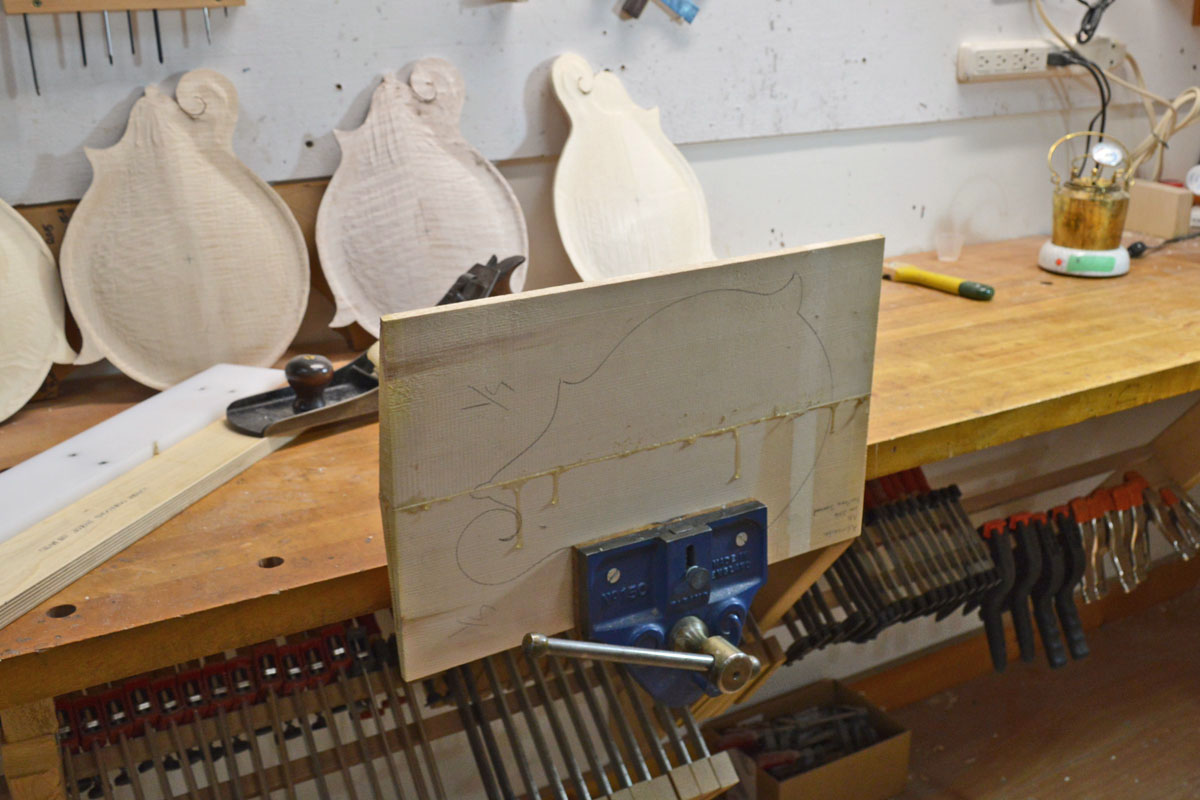
Two such innovations are shown in the photo below. The first being my unique neck block design which I have been using for quite some time now. In the photo, I have penciled in the the shape of the conventional block. (the curved line to the left) My block is designed to give the top (and back) plate a more solid support just as a speaker with a rigid frame will produce a more powerful sound with less distortion when driven hard. In order to minimize the added weight of my "extended" block, the extra support area is hollowed out in a way that retains much of its stiffness.
A fairly recent innovation are the perpendicular holes drilled in the block near its rear edge. This reduces the block's weight by about 7 - 10 grams. Not earth shattering but like I have learned from the world of custom motorcycles, every little detail adds up.
While I remain committed to the traditional methods of hand crafting each one of my mandolins using time tested materials, I also strive to find innovative ways to continually and methodically improve and build upon "the Apitius sound".
'just for fun, below is a photo of how these neck blocks start out. That's a slab of genuine Central American Mahogany that I will process into neck blocks!
Until next time,
thanks for reading,
Oliver
November 9, 2017
This month's blog is a brief description of the way I create a "rub joint" for the center seam of a top or back plate. For those who don't already know, the top and backs of most stringed instruments are made up of two halves with a center seam in the middle. A flitch of wood is split or sawn in two lengthwise then folded out like the leaves of a book. The two halves are then joined together in this orientation so that one half will be the mirror image of the t'other. This is what is referred to as book matching. It can create quite stunning patterns in figured wood but traditionally, its main purpose is to keep the density/stiffness of the plate as uniform as possible for more even modes of vibration.
Since the top and back will be carved quite thin, especially near the perimeter or, re-curve area, this glue joint must be absolutely perfect. Many larger production shops use a stationary jointer/planer to create the straight edge of the center seam and then glue the pieces together with a clamping fixture of some kind. I myself have used this method for many years with good results but for the ultimate center seam, I have now gone to the tried, true and never surpassed quality of a traditional "rub joint" as used by the greatest violin makers for centuries.
This type of joint requires no clamps but instead utilizes perfectly smooth, plane shaved joint surfaces and the properties of traditional hot hide glue to draw them together. For this joint, I use an ultra strong grade of hide glue with a gram strength rating of 315.
A conventional jointer machine with its rotating knives will inevitably create tiny scallops on the mating surface of the plates. These can be overcome by glue and clamping force but the sheared, dead smooth surface left by a traditional hand plane with a well honed, razor sharp edge is a pillar of creating the ultimate, virtually invisible joint.
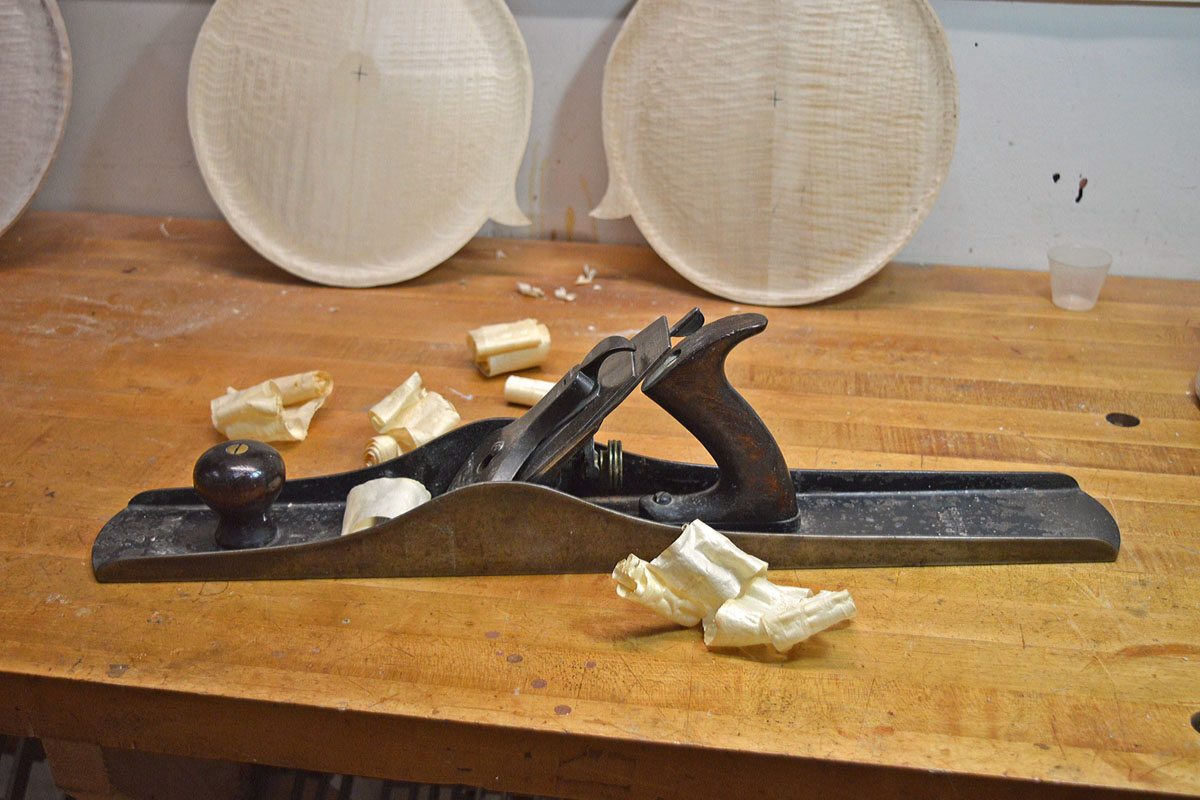
My weapon of choice is a Stanley Bed Rock No. 607 jointer plane that I purchased from a trim carpenter years ago. It was made sometime between 1895 and 1902 according to a book of Stanley planes that I once had access to. Back then, these were the state-of-the-art in plane design and quality. Tradesman made their livings with these tools. By the 1950s and 60s, power tools were taking over and hand planes were increasingly a hobbyist's tool. This resulted in less competition amongst plane manufactures and a gradual drop in quality. Today, there are a number of specialty tool makers once again making very excellent quality hand tools but I have come to love my 100 year old Stanley Bed Rock and its sole could not be any truer.
Stanley Bed Rock #607 Jointer Plane Pat'd April 2, 1895
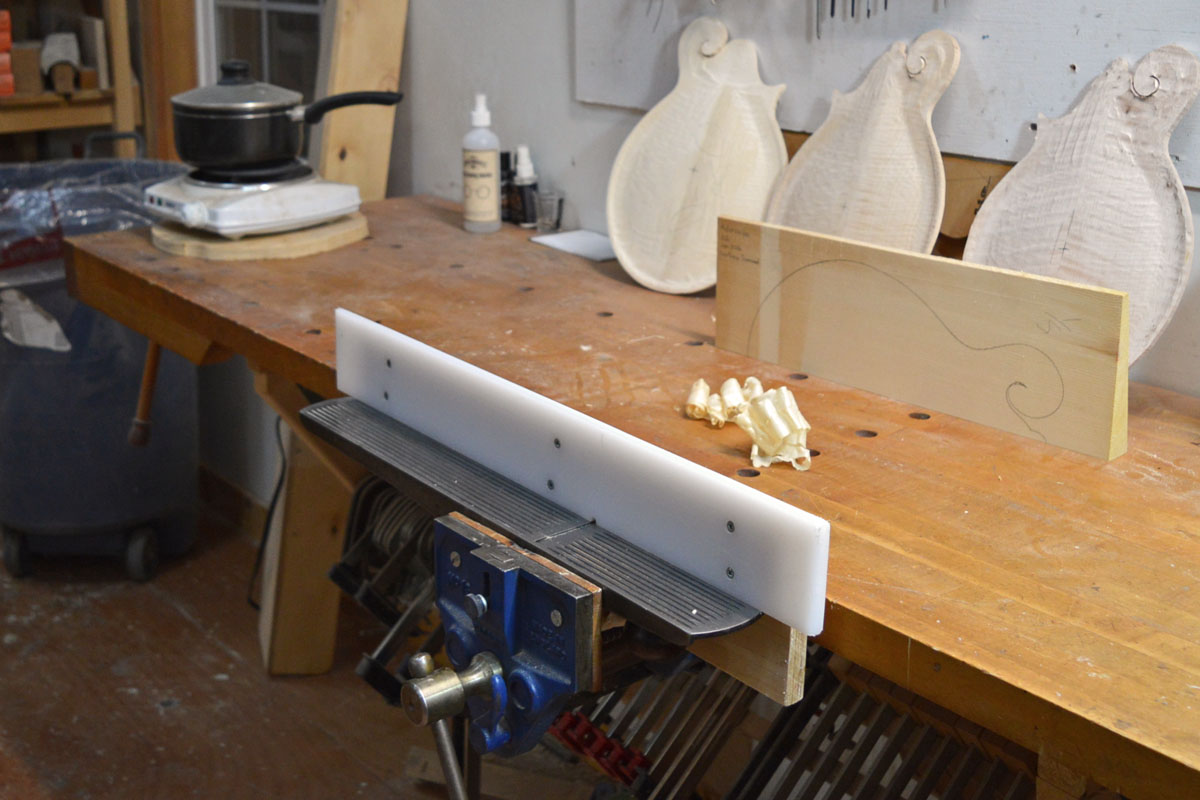
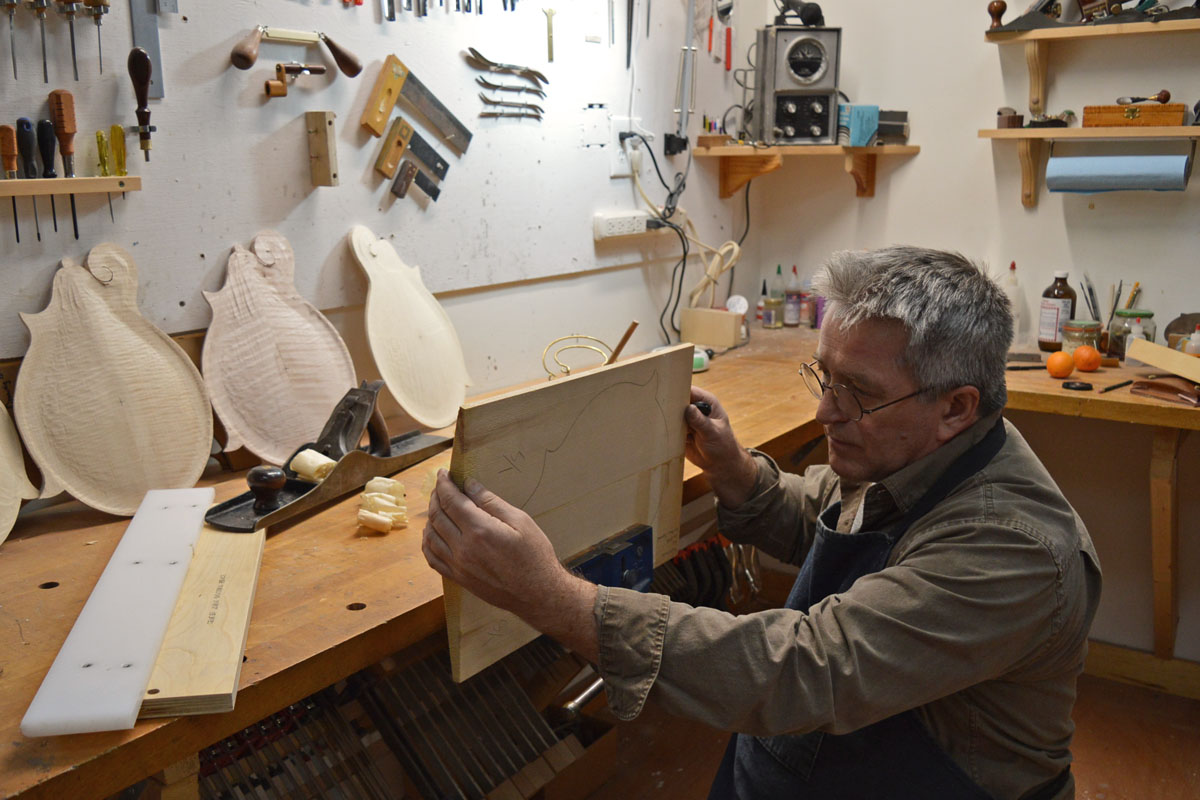
To make things easier and more consistent, I made a simple "shooting board" to help guide the top and back plates over the sole of the plane and keep the joint a perfect 90° to the bottom face of the plate.
The jointer plane and fence are held in place by a vice.
Here is how the shooting fixture works in action............
The fence keeps the inside surface of the plate 90° to the center joint.
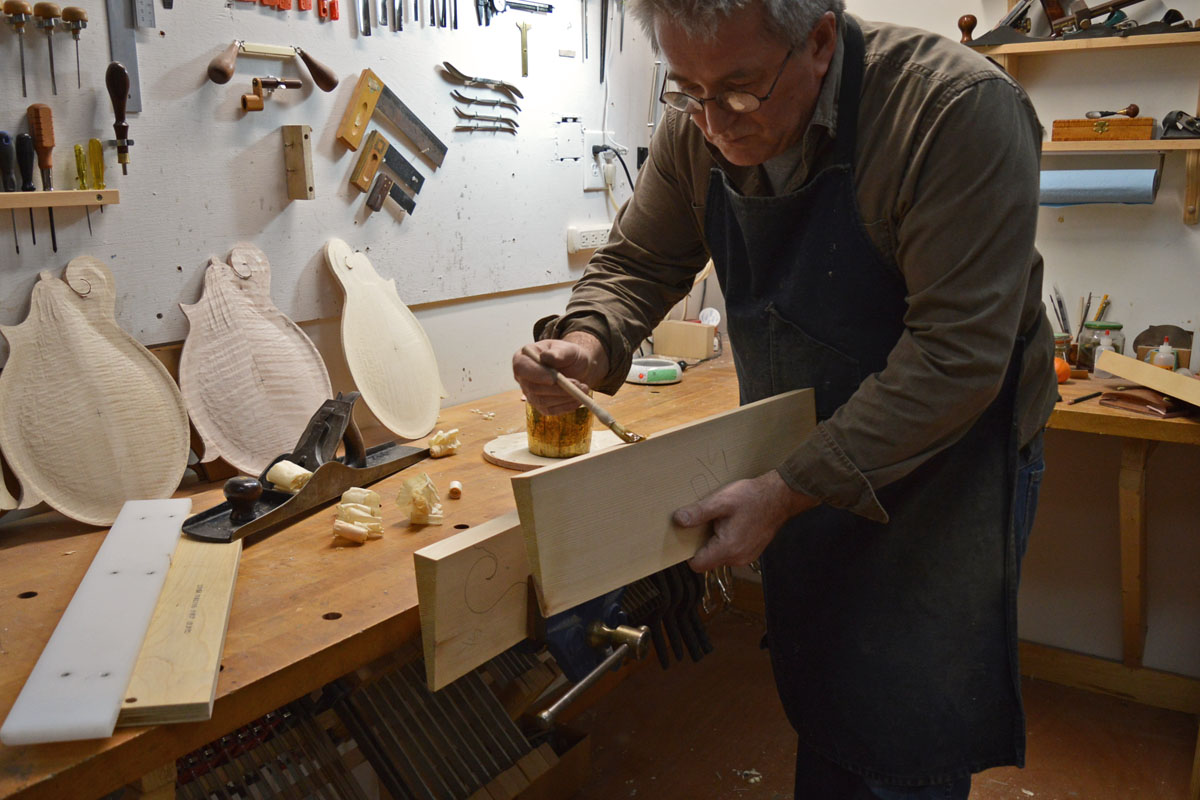
When the two halves are perfectly straight and smooth, high strength, hot hide glue is brushed onto both edges.
Here's where the term "rub joint" comes in. With hot hide glue applied to both edges of the joint, the two halves are brought together and firmly rubbed until the joint is well seated. No clamps are needed. The hide glue will shrink as it cools and dries drawing the joint tightly together.
The glue will be left to dry in this position for a half hour or more. It can then be carefully moved to an out of the way location where it will be left to dry overnite before doing any further work on it.
And there you have it. A joint that is stronger than the wood itself with no clamping. Of course this method does not lend itself to high volume production but is another example of a centuries old technique that has yet to be improved upon in terms of absolute quality.
Thanks for reading,
Oliver
October 3, 2017
It's hard to believe that it has come and gone already. This is the second year in a row that we traveled down to Raleigh NC for the IBMA "World of Bluegrass" trade show. I have to say that I never could have done it without the tireless efforts of my wife Jody. She spent two entire weeks wading through the mounds of paperwork that it takes to bring a car load of samples and other trade show accouterments into and out of the U.S. these days! For that, I am truly grateful.
The trip down was very pleasant as we wound our way through the Blueridge Mountains, passing Mount Airy, the real life location of the fictional town of Mayberry for those of you old enough to recall the Andy Griffith Show. I believe I saw more than one plastic Andy Griffith perched on the dashboards of the passing cars.
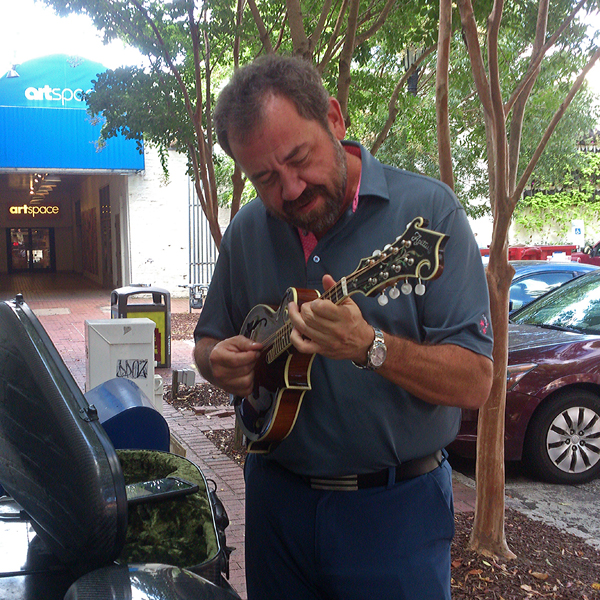
The first morning that we awoke in the friendly town of Raleigh, we had the great honor and pleasure of having breakfast with the extraordinarily talented, Dan Tyminksi! Dan told us about his exiting new career direction, a project called "Southern Gothic". "Whatever you think it is" he said,"it's not that."
I had arranged to show him the new Apitius "Classic Model" mandolin with X-bracing that I had made for him. This will give him a new sound pallet to add to the Apitius that he already owns. I was so happy to see Dan's reaction as he ran it through its paces in the courtyard behind "Big Ed's" restaurant.
Dan Tyminski trying out his new Apitius Classic Model mandolin.
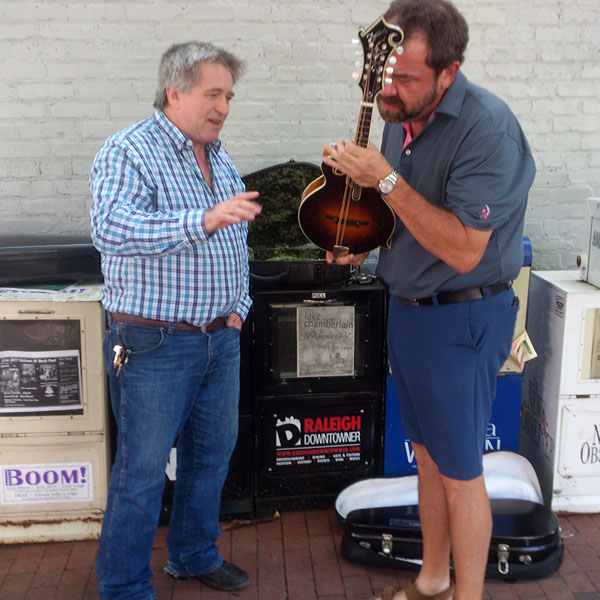
Here I am, doing my best to answer all of Dan's questions.
Dan was so kind and generous to let me use his new mandolin as a demonstrator model at the trade show after only getting to play it for an hour or so. It did get an awful lot of playing over the course of the four day event. So much so that I will have to give it a light polishing before shipping it back to Dan to keep.
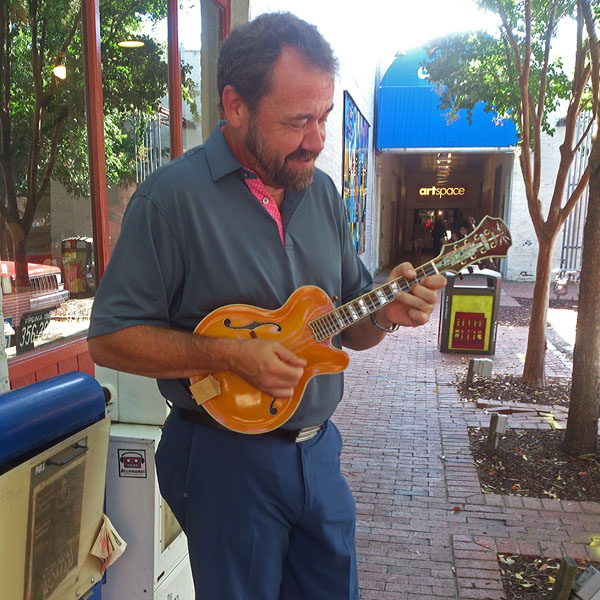
I also wanted to show Dan my new "Yorkville" jazz model just to get his reaction and it couldn't have been better. To my utter surprise and delight, he asked me to put him on the list and ordered one right there on the spot! The IBMA show could not have gotten off to a better start!!!
Dan Tyminsky with an Apitius Yorkville jazz mandolin.
Floating away from Big Ed's Country Kitchen, Jody and I headed over to the convention center to set-up our booth. Last year's motif was a pickin' parlor. This year we went for a more modest pickin' porch and Jody did a great job of organizing and decorating our 10 square feet of prime IBMA real estate.
We truly enjoyed meeting new players and reconnecting with those that we met last year. Bluegrass people are truly some of the friendliest and kind people you could ever hope to meet.
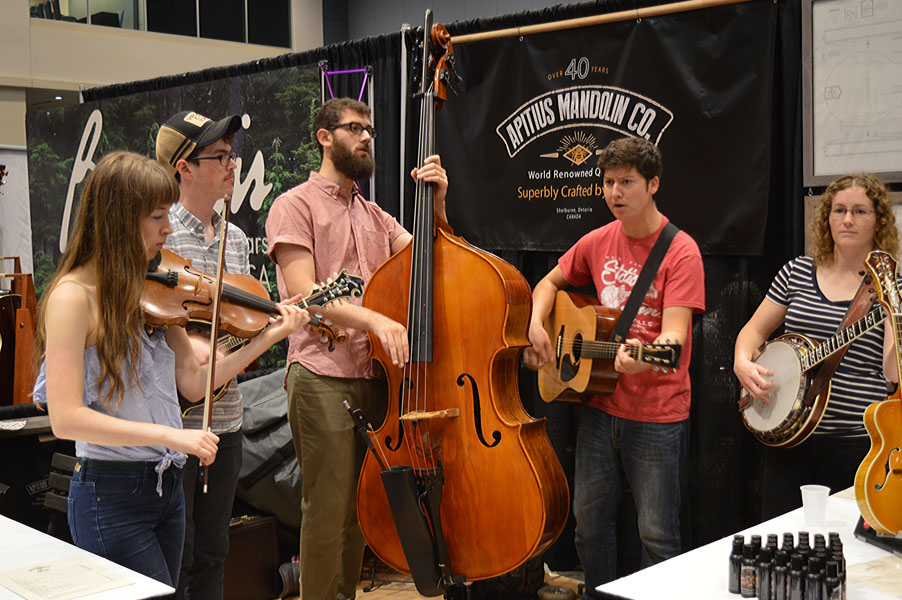
On day two, we were so happy and honored to have the band, Mile Twelve drop by to perform some songs in our booth. They were the winners of the "Momentum" Award this year and for good reason. This band is going places both figuratively and literally. By the time you read this, they will be flying off to do a two month tour of "the land down under". Starting off in New Zealand and then going over to Australia. (I asked David Benedict to tell me if the toilets really do swirl the other way around down there.)
Mile Twelve performing at the Apitius Mandolins booth
Mile Twelve with guest vocalist Greg Blake
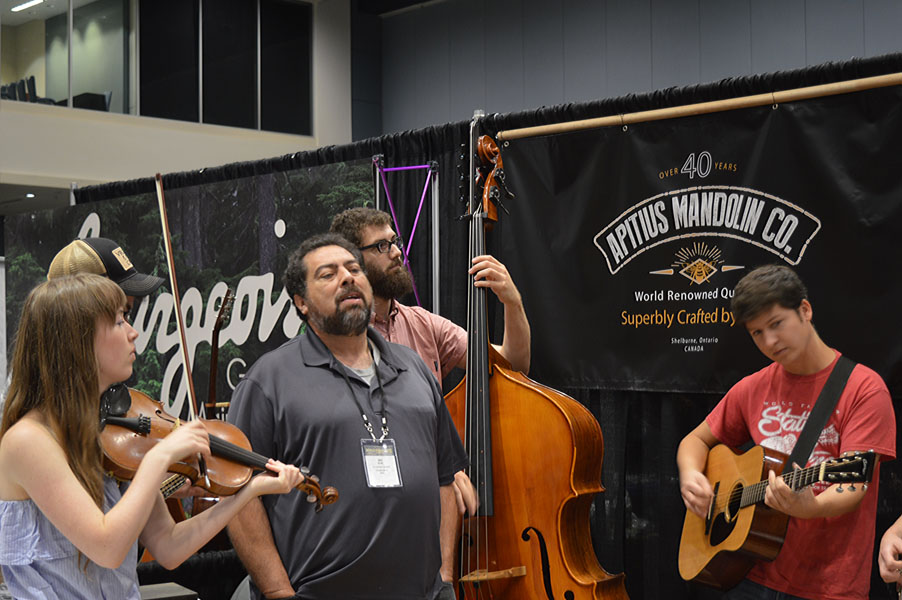
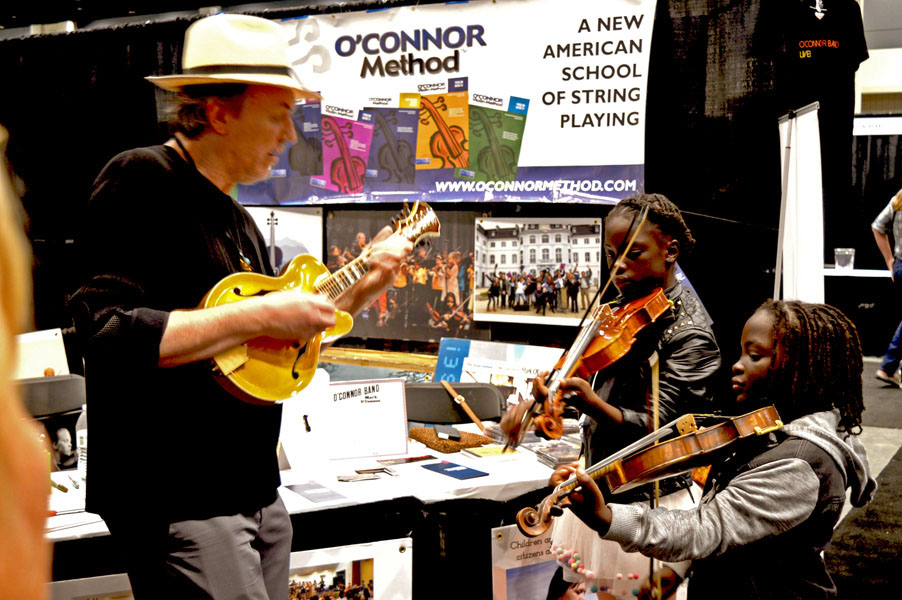
On day three, I met up with Forrest O'Connor of the O'Connor Band and was rewarded with a back stage pass that allowed me to catch the O'Connors perform at the large, open air amphitheater in Raleigh, called the "Red Hat Theater" with "ring-side seats!!!! Forrest and his talented wife, Kate, were so kind and gracious to both Jody and I. Forrest really seemed to dig my mandolins as well. I wouldn't be surprised if the names O'Connor and Apitius are spoken in the same sentence in the not to distant future. I've got my fingers crossed on that possibility.
I also had a chance to spend some brief moments with the legendary Mark O'Connor as well. He couldn't have been kinder. From what I could see, Mark seems to take great delight in teaching and mentoring young aspiring fiddlers and they seem to take to him and his teaching style as well.
Here's Mark accompanying some young talents on a borrowed Apitius jazz model mandolin.
I don't want to end before saying a word or two about the town and people of Raleigh, North Carolina. I have been to places near and far and I have never met more friendly and kindly people than the good folks of Raleigh. If your looking for good places to eat, there are a multitude of independently owned establishments that serve up a wide variety of both local and foreign cousine. From trendy locally grown organics to pulled pork barbecue with local brews, Raleigh has something for everyone. I'm especially found of Cajun fare so Jody and I found a great place in town called "The Big Easy" where I had me some good gumbo and ate 'gator for the first time. I know, I know, it sounds cliché but it actually did taste a lot like chicken.
We met so many good folks at our convention center booth it is just not possible to mention them all. Our good friend, James Cook of Bourgeois Guitars took up the booth next to us again this year and this year, I also got to meet Dana Bourgeois for the first but hopefully not the last time.
Two people came by to play "cripple creek" and say "I don't want a pickle" for their choice of a free T-shirt or blueprint set. A couple of people wore their Apitius Tees from last year which made us feel great. One of them, Greg Silverman even managed to coax me into playing a little "Soldiers Joy" on his Gilchrist A-model (I very rarely play in public).
Greg Silverman and myself playing Soldier's Joy (I'm playing Greg's Gilchrist mandolin)
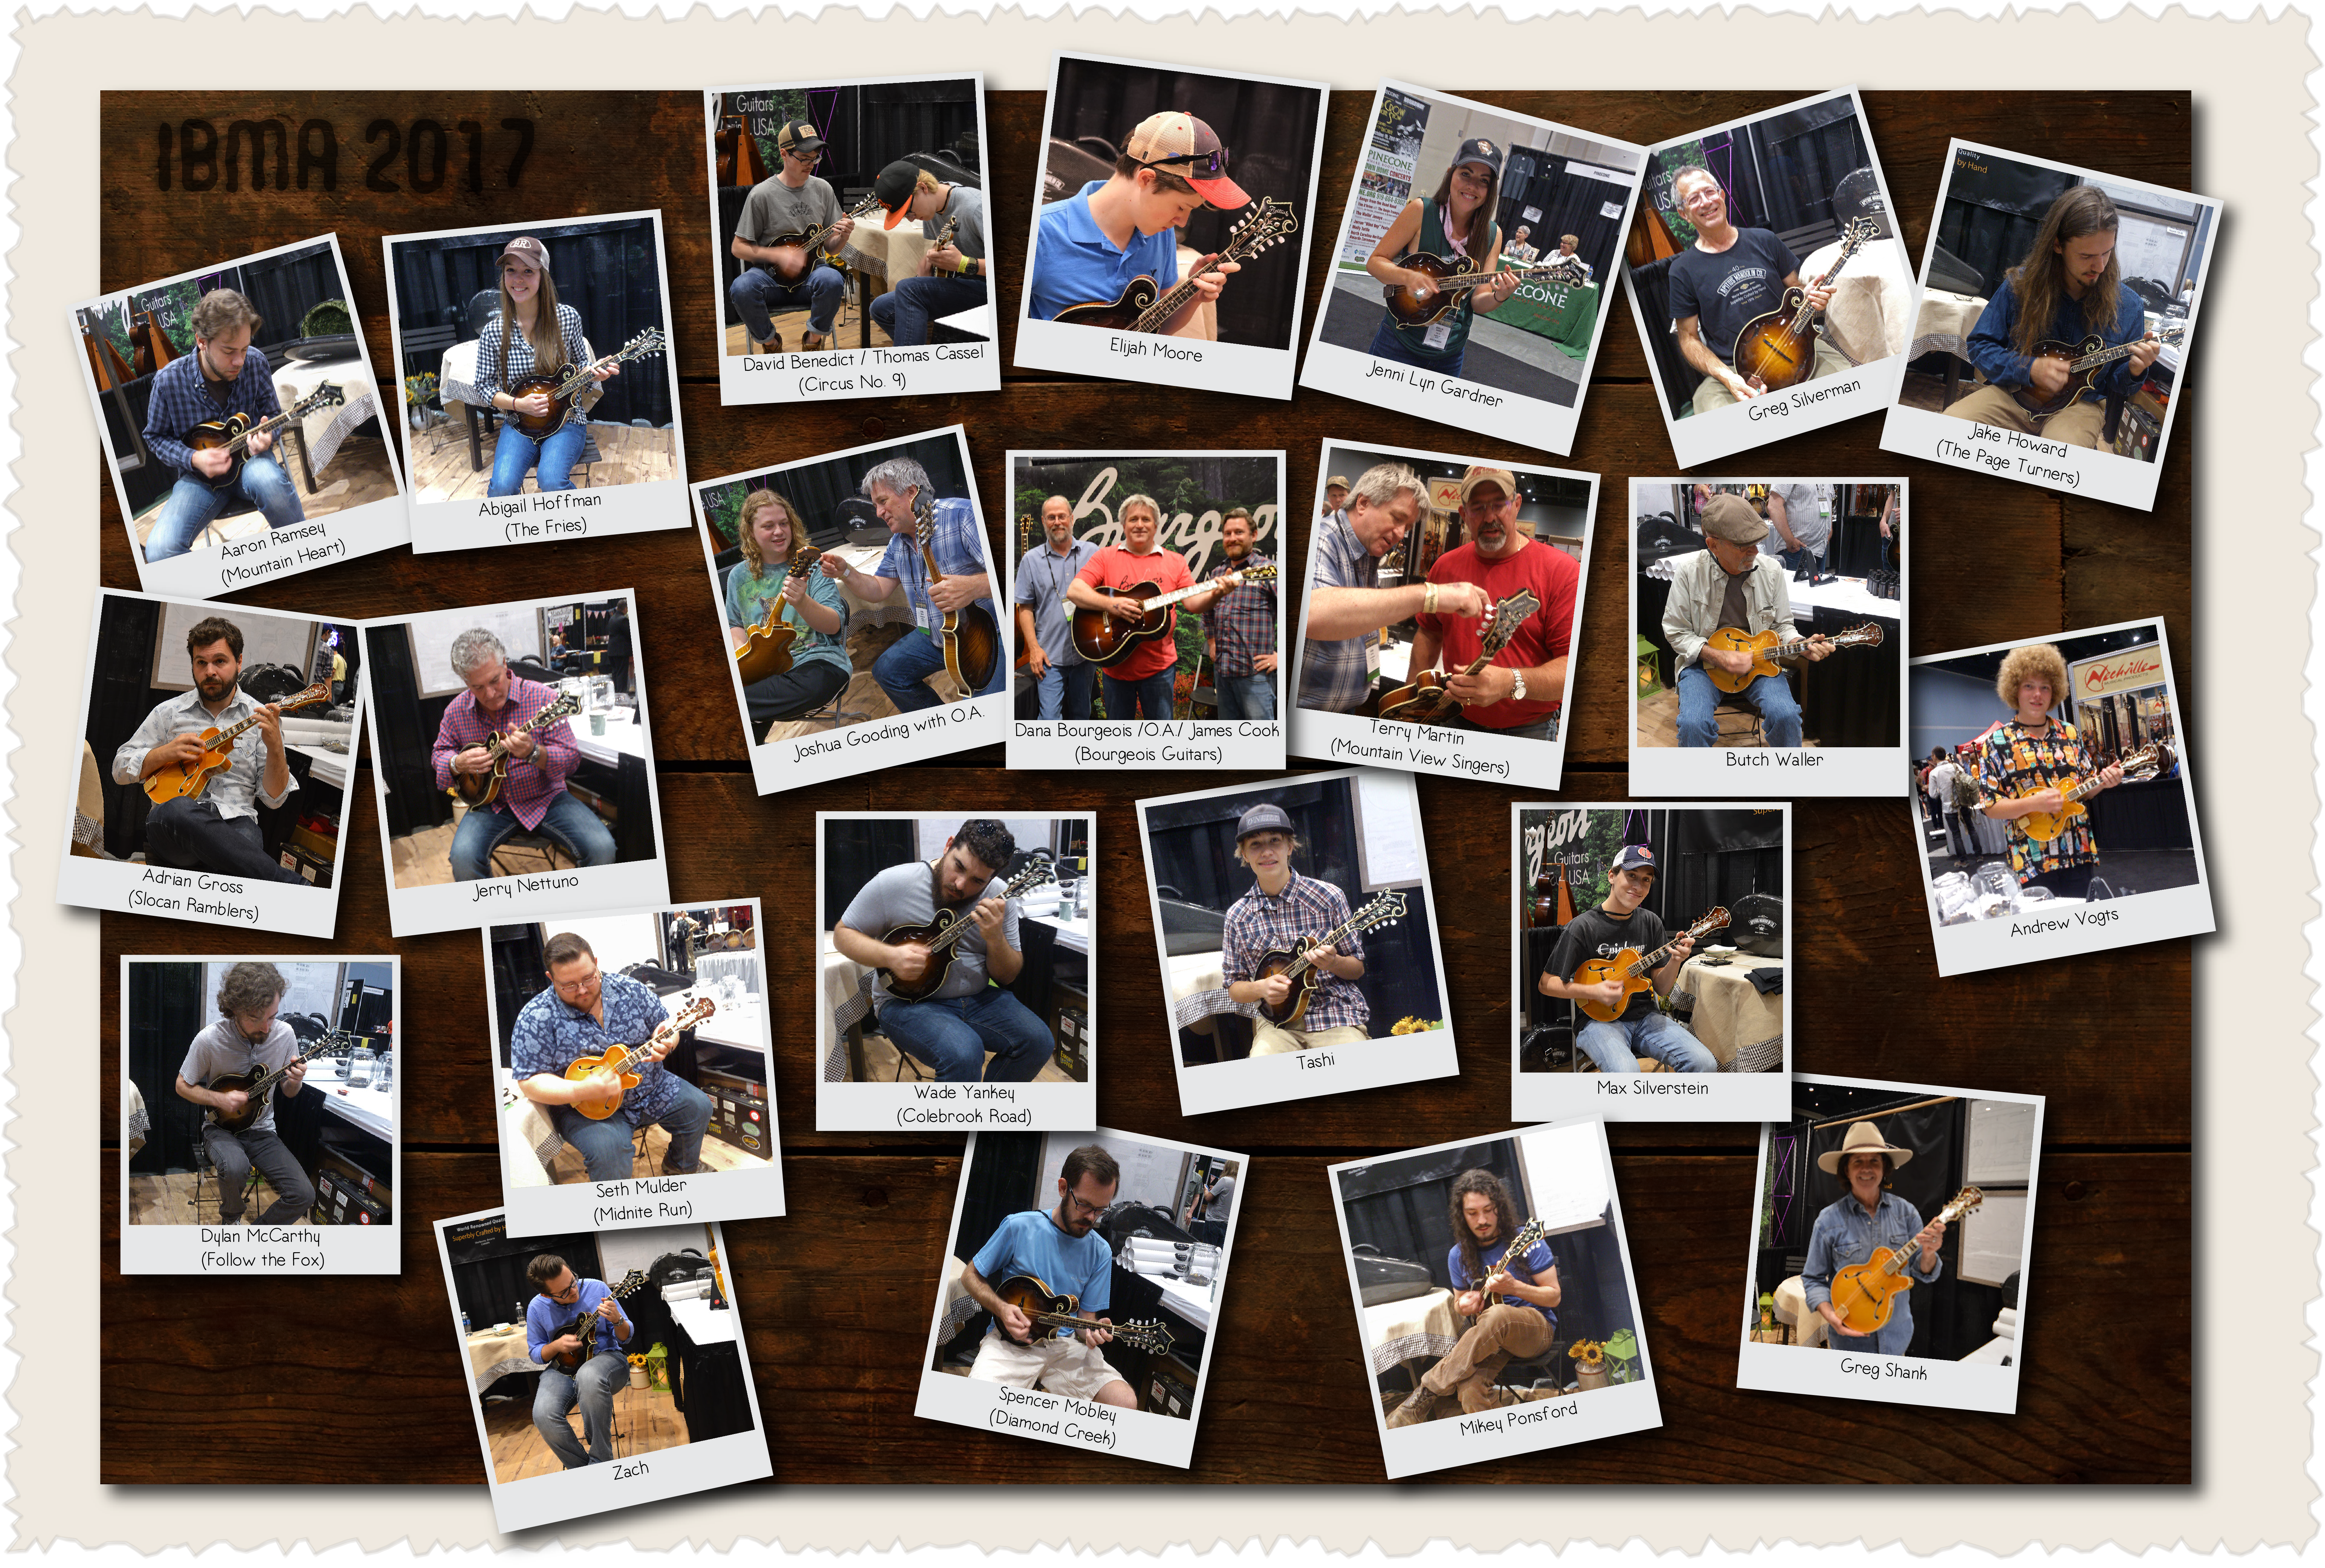
Well, I could go on for days but I need to get back in the shop. I'll leave you with a collage of photos of some of the people that stopped by our booth. Please accept my apologies if I didn't get you up there (or got your name wrong). We thoroughly enjoyed meeting you all (y'all ?) and very much hope to do it all again next year!
Thanks for reading,
Oliver
September 12, 2017
2017 has been an extraordinarily busy year for my wife Jody and I. I took on a number of special projects and then wouldn't you know it, our house suddenly needed urgent repairs. Most years, we have been able to take a couple of weeks vacation, one or both of which were used to take an extended motorcycle tour to somewhere in Canada or the U.S. We would just point the bikes in a chosen direction and see where the road lead us. The longest such trip was 6,000 kms (4,000 miles) in two weeks.
We were feeling a little down by the situation when we came up with an idea to get in at least a weekend getaway. I noticed that one of my endorsers, David Benedict was going to do a house concert in Rhinebeck, NY as part of the band, "Mile Twelve". Rhinebeck! House concert! Two of my favorite things. I have always loved acoustic music played in intimate settings with little or, preferably, no amplification to get in between me and the music. It's the ultimate way to hear music as far as I'm concerned.
Now, the ultimate way to fly is in an open cockpit bi-plane and I knew that Rhinebeck NY was home to Cole Palen's "Old Rhinebeck Aerodrome" where they have the world's largest collection of WW1 flying machines in flying condition! Every weekend in the summer, they put on an air-show that takes you back to the 1920s. The days of the barnstorming air shows, joy rides and fine arched top mandolins.
Combining these two things gave Jody and I a much needed change. We would have taken the motorcycles but the weather was uncooperative on the day we left so we got in the car and made the 10 hour drive to Rhinebeck. Just in time to catch a great house concert by Mile Twelve and meet the other members of the band for the first time. 'very nice people, all. We did the customary exchange of T-shirts and other swag but David was the first to don one of the offerings and had this photo taken to prove it.
L-R Jody/David/Oliver
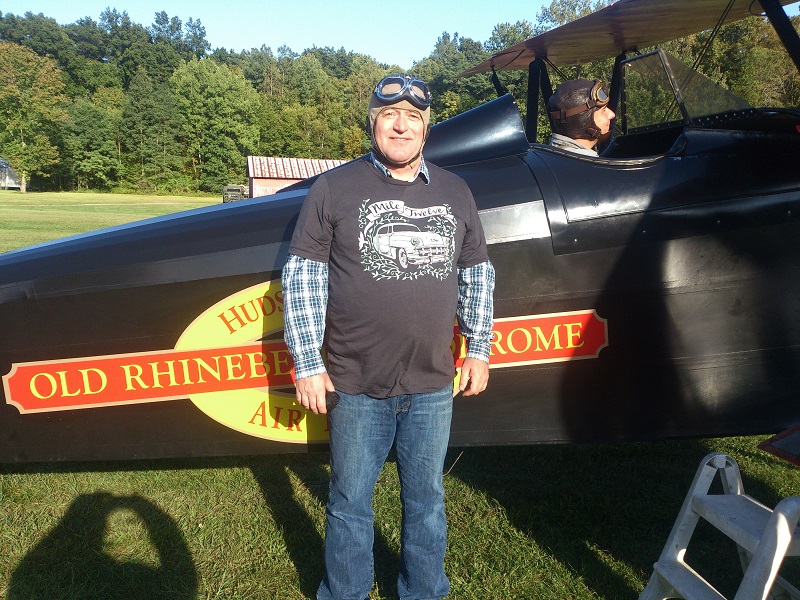
Not to be outdone, I decided to wear my Mile Twelve shirt while high in the air in an open cockpit bi-plane.
That's me just before boarding a 1929 New Standard D25
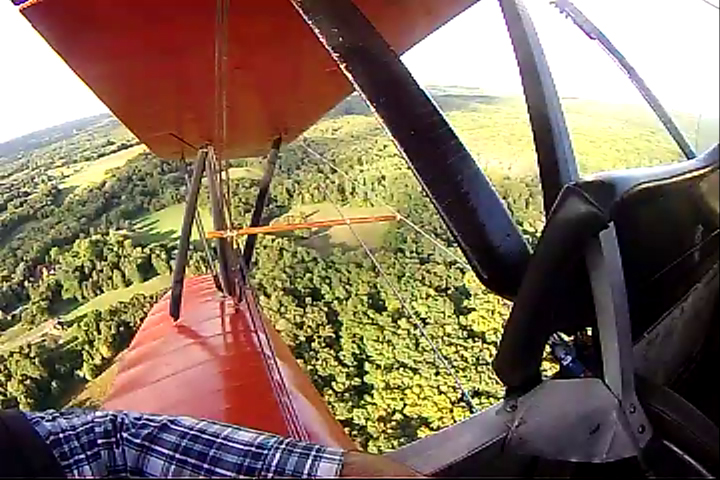
Here's a couple of shots taken high above the Hudson Valley.
For those of you flight enthusiasts, heres a video of our flight that day.
Well that's all for this month's blog post. Now back to work getting ready for the IBMA (International Bluegrass Music Association) trade show at the end of the month in Raleigh, North Carolina. If any of you are planning on attending, please stop by to say hello. We will be in booth #307 right beside Bourgeois Guitars.
Thanks for reading,
Oliver
August 8, 2017
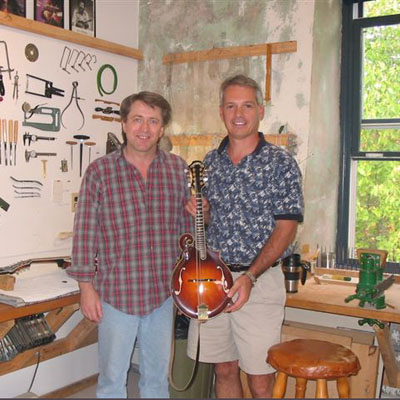
I love it when life hands you a peach! A couple of weeks ago, two old friends of mine contacted me and wondered whether I'd be interested in spending a day with a 1924 Lloyd Loar mandolin (serial no. 76081) with the freedom to thoroughly examine it and document anything we could measure. Well of coarse I had to think about it...................... for about a half second!
The two friends in question were Tim Bellamy, an accomplished player and budding builder who would be bringing the borrowed mandolin to the "inquisition" and Mark Schnurr, a highly regarded violin and mandolin maker whose well equipped shop would serve as the examination room. Here we are, the three of us.
Tim Bellamy (right) with author.
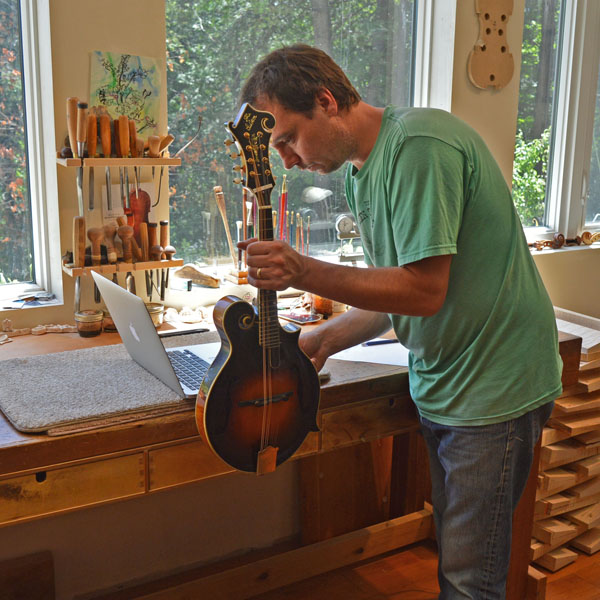
Mark Schnurr, analyzing Loar mandolin.
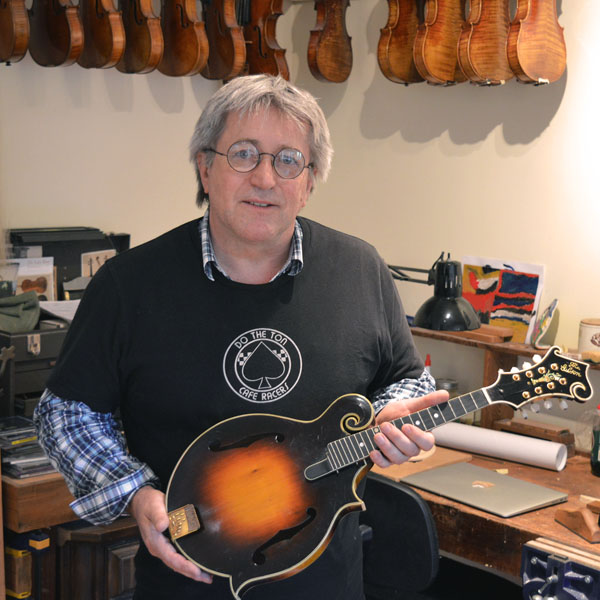
Author. with un-strung Loar #76081
Since Tim was voted the official photographer, I had to use an old image of him and I that was taken back in 2004. Tim hasn't aged a bit, me, well, let's say the hammer of life has struck a few blows.
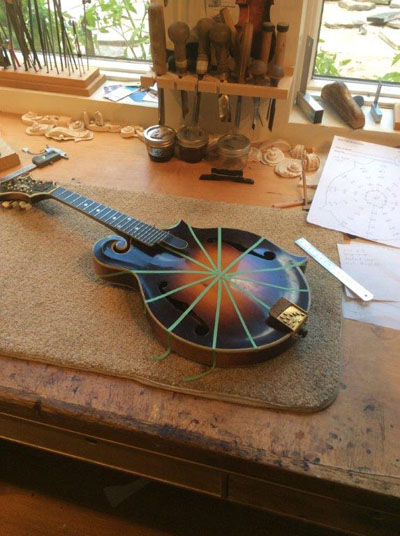
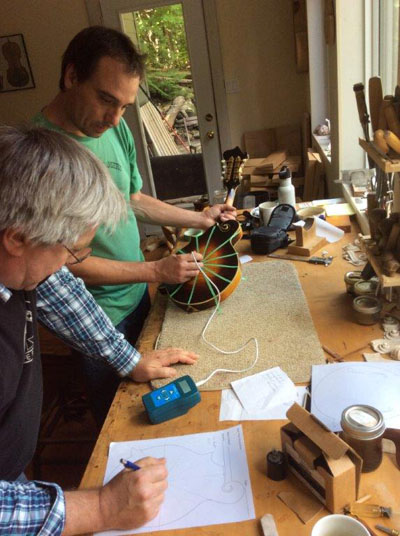
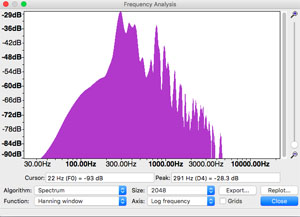
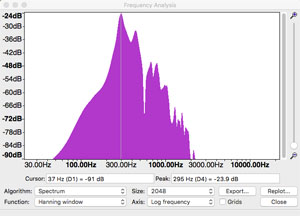
One of the first things we did of course (after much gawking) was to measure the thicknesses of the graduations. We decided to make the measurements in a pattern of expanding circles radiating out from the center of the plates. This, we reasoned, would be most likely to show any intentional patterns in the thicknesses. To accomplish this, strips of 1/4" tape were applied to the plates in a spoke like pattern with the hub at the center of the arch, or in case of the top, the center of the bridge location. The strips of tape were then marked with equally spaced lines to locate the points of measure. While Mark manipulated his electronic thickness caliper, I read out the numbers and recorded them on a special form.
In addition to measuring the graduations, various tap-tones were recorded ( the main air resonance was measured to be near a D4 which is quite typical of Loar signed mandolins), archings were mapped and measured, f-hole rubbings were made, a Saunder's type loudness curve was plotted and a casting of the back plate was made.
In summing up, a wealth of experience and knowledge was gained, while in the company of two long time friends that I don't get to see often enough. It was so kind and generous of them to include me in this extremely rare opportunity. Speaking of generosity, we all owe a great debt of gratitude to the owner of this rare Lloyd Loar signed mandolin. Thank you so much for letting us have such and intimate look at this historic instrument!
Until next time,
thanks for reading,
Oliver
June 3, 2017
I've been very busy lately finishing up orders for a "Studio-A", a "Vanguard" and a "Yorkville" jazz model mandolin. I'm happy to say that those are all completed and ready to ship to thier awaiting customers. This week, I got off to a bit of a late start on two more F-models, one "Classic" and one "Grand Classic". I put together this video fairly quckly while using my pantographic carving machine to rough out the tops and backs. Specifically, the video below shows me roughing out a top plate. I leave the plates a little over-sized to allow for final carving by hand.
Until next time,
thanks for watching,
Oliver
June 5, 2017
Something a little different for this month. A Vlog!
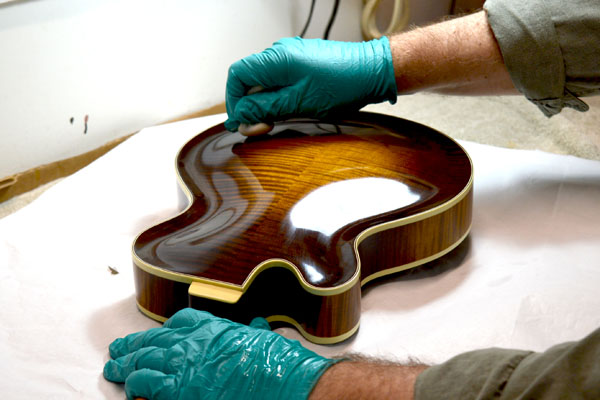
This month I present a video of how I approach the French polishing of one of my mandolins. This is part 1 (the bodying sessions) but I'm not certain that I will have the time to do part 2 which I call the polishing sessions.
Warning: This video contains subject matter that , unless you are among the most ardent of mandolin nerds, could bore you to death. Viewer descretion advised.
Until next time,
thanks for watching,
Oliver
P.S. The follow-up videos to this one can be found on my Vimeo channel.
May 1st, 2017
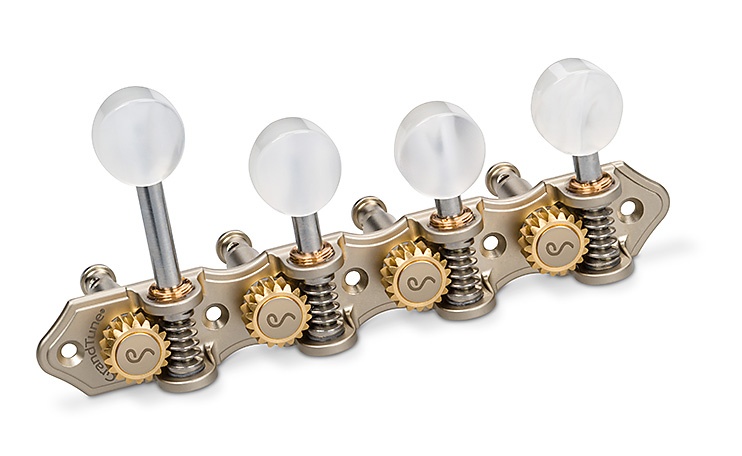
Recently, the good folks at Schaller sent me a free sample of their newly designed, GrandTune® mandolin tuners in exchange for my reviewing them and reporting back. Schaller has been using this revolutionary "Velvet-Tec" technology on their GrandTune® guitar tuner series for a while now but they just recently rolled out mandolin sets that utilize this same cutting edge design.
I must say that I was pretty skeptical (as usual) that these tuners would be noticeably better than anything I have seen on the market up until now. After all, at it's core, a tuner is just a simple worm and cog gear mechanism but after holding a set of these little marvels of engineering in my hand, all that skepticism quickly evaporated. In my opinion, these tuners are real "game changers".
They start with a relatively simple and elegant design re-think and then carry it out with the highest quality materials (such as their new formula "bell brass" bushings) and "hyper-accurate" machining of gear joints and fittings. No fancy polymers or other coatings are used to achieve the high level of lubricity, rather, the high quality alloys provide the silky smooth performance with nothing to wear off or degrade over time. Schaller is so confident that these tuners will function trouble free for generations, they have permanently locked, covered and sealed all the screw joints for a lifetime of maintenance free performance.
As I held these tuners in my hand the first time, I grabbed hold of the string posts and worm shafts to check for the amount of play by applying lateral pressure to the components. To my astonishment, the play was zero! They felt as rock solid as if they had been welded together but turned with a smooth yet solid feel, like steering a Porsche. This complete lack of play, not only assures that the worm and cog remain in perfect alignment, it also prevents any sympathetic vibrations and rattles to absorb sound energy and create undesirable noises. I think that part of the the reason these tuners are such high quality, is that unlike most brands of tuners that have gone to lower cost off-shore countries to manufacture their tuners, Schaller still makes all of these GrandTune® machine heads in house at their facility in Bavaria, Germany.
I'm sure this all reads like paid advertisement for Schaller but I assure you that aside from receiving one free set of tuners, I have no financial remuneration from Schaller. It's just that I am so pumped about these tuners. I have been wanting high end tuners at a fair price for decades, to match my desire to offer the serious musician the highest quality instrument possible.
In that spirit of wanting to offer my customers only the best, I have decided to make Schaller GrandTune® tuners my standard tuners going forward and I'll absorb the extra cost in order to hold my prices at the current level.
Until next time,
Thanks for reading,
Oliver
April 7, 2017
I'm a little late for this month's blog post. I've been extremely busy the past month. I have several new projects on the go along with my usual schedule of building mandolins. I won't disclose what those projects are at this time but I plan on making some exiting announcements later this year.
Currently, I am working on two customer ordered mandolins. One is a Vanguard model F-style and the other is a Studio-A. I spent the day applying the binding to the pegheads of these mandolins and I thought I'd give a brief overview of the process. In the past, prior to my temporary absence from luthiery, my pegheads were straight sided and uniform in thickness. Binding them was a matter of routing a ledge (rabbet) around the perimeter and applying the various sections of binding. Since re-starting my business, I have re-worked nearly all of my molds, templates and methods to much more closely capture the outward ascetics of the mandolins of the 1920s. As a result, my pegheads are now tapered in thickness and the sides are cut at an angle to the peghead face. For this reason, the rabbets for the binding cannot be cut with a basic router set-up as the pilot bearing will not follow the twisting contours of the peghead shape.
There is no real practical purpose for angle cutting and tapering the headstock. It is purely a more esthetically pleasing way of doing things. We humans like to see shapes that resemble nature and in the natural world, there are few straight and uniform shapes. The subtle twisting and tapering of the peghead lends it a much more organic vibe that is just easier on the eyes. I have to stand in awe of the designers of the Lloyd Loar era mandolins in that they did not take the easy way out. No, they were truly intent on creating not only a new design, but one with as much or more refinement as was reached with violins over 200 years prior.
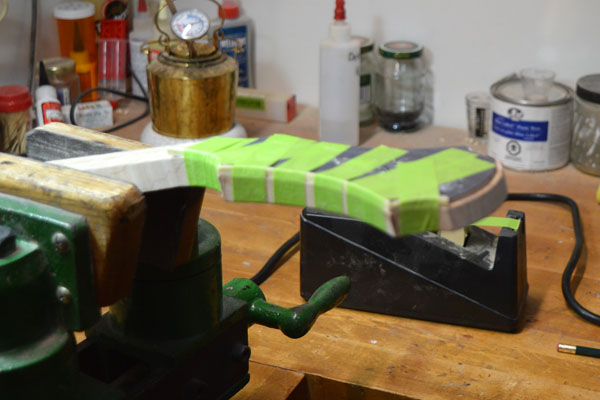
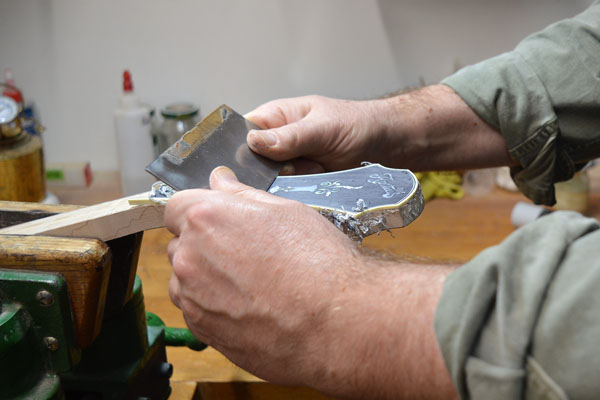
In order to achieve this easily overlooked detail, the headstock veneer plate is cut to shape and binding applied before the peghead is given its final shape. In the photo below, (sorry for the poor focus) I have glued the pre-shaped peghead veneer to the peghead face and rough trimmed the peghead, leaving it oversized enough to apply the binding to the sides of the veneer.
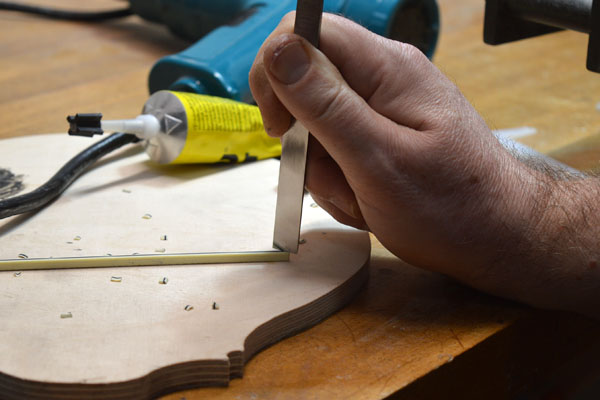
The celluloid binding is heated just enough to make it pliable and then shaped to the various sections of the peghead profile, in this case, an A-model. If the binding scheme is to have strips of contrasting lines (purfling), then the joints must be painstakingly mitered to create the effect of a continuous line, or lines, framing the headstock. Simple butt joints were used where the binding had no purfling strips. The miters can be cut with a razor sharp chisel as in the photo below. Note that you can see in the reflection of the highly polished surface of the chisel, the resulting angle of the miter to be cut.
Note angle of miter reflected in the chisel face.
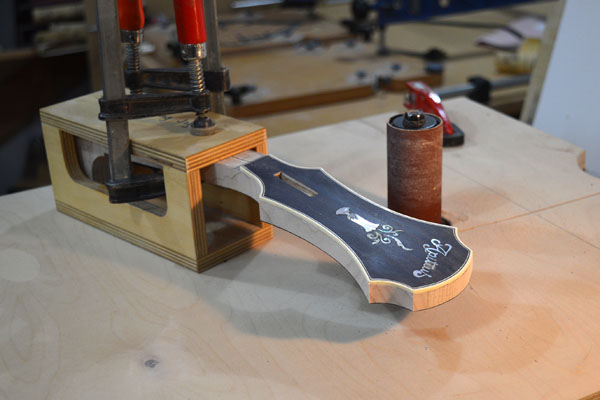
Once all the sections of binding have been glued into place and the glue has dried, the top faces are scraped flush to the peghead face.
After that, the sides of the peghead are sanded flush to the bindings using a fixture that holds the fingerboard surface of the neck blank horizontal to the perpendicular orientation of the spindle sander.
The result is a gently twisting contour to the peghead sides.
I believe that it is attention to subtle details such as these that separates a good instrument from one that is truly first class.
Until next time,
thanks for reading,
Oliver
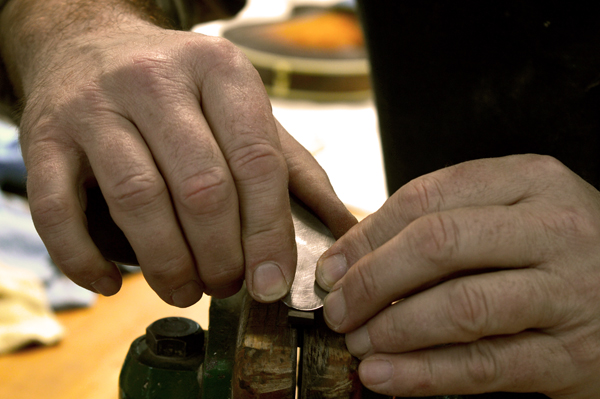
March 5, 2017
Mandolin bridges must be fitted very accurately to the contours of the mandolin's top. Any gaps in the fit will decrease the efficient transfer of the string's vibrational energy to the top of the instrument resulting in a loss of volume and richness of tone. The traditional way of achieving a perfect mating surface on the bridge feet is to fasten a piece of sandpaper to the top, in the area of the bridge and then to rub the bridge feet back and forth (some use a side to side motion) until the bridge base conforms perfectly to the mandolin top. Until very recently, I have always held onto the bridge by hand while performing this task and achieved very good results. It is extremely important to hold the bridge in a consistent, vertical or slight back angle while moving the bridge across the sandpaper in order to ensure that the base has the correct concave profile.
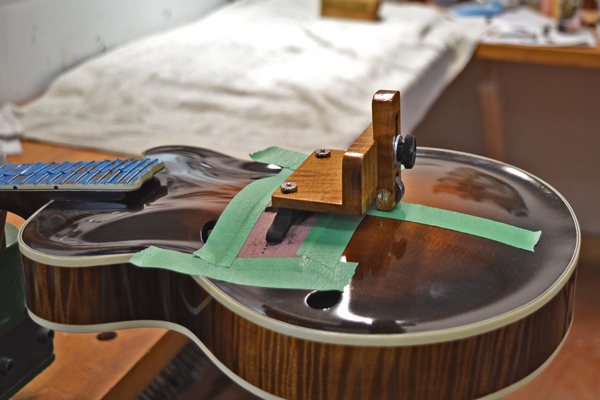
With the introduction of my new J - series of jazz mandolins with their more twisting compound curves, I decided to make life easier for myself by constructing a little jig that holds the bridge in perfect orientation while I move it back and forth across the top. I didn't come up with the idea for this jig myself. This type of fixture has been used by arch-top instrument builders for many decades and there are a few different versions of these available from various suppliers. After looking at the available bridge fitting fixtures, I decided to make my own incorporating and modifying the elements that I liked best.
As you can see below, it is a very simple jig that uses the bridge base's own screws and thumb-wheels to secure it in place. A small ball bearing, lifted from an old router bit serves as a roller wheel and creates a stable three point contact area. The wheel height is adjustable via a small thumbscrew, allowing the correct bridge angle to be securely set.
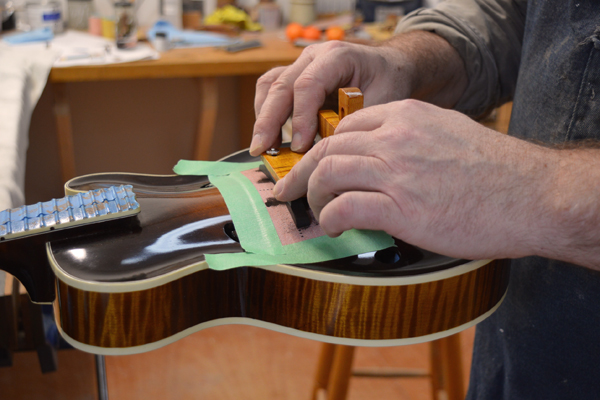
In use, the jig is grasped with both hands and rolled back and forth with very short strokes about 10mm in total. That is, 5mm forward of the bridge's ideal location and 5mm behind.
When ebony dust from the bridge base can be seen across its full length, the bridge is properly mated to the top. Each bridge must be carefully fitted to the particular mandolin it will be used on.
Just to be absolutely certain of a tight and solid fit, I like to create a very small hollow in the bottom of the bridge feet, about .002" deep, using a curved scraper.
The photo above shows me scraping the very slight hollow in the bridge feet. This will ensure that the perimeter of the base will be solidly seated to the top for maximum coupling and energy transfer.
Here's a look at the completed fit.
Until next time, thanks for reading,
Oliver
January 27, 2017
My apologies for skipping January's blog post completely. With all of the extra holiday preparations, I got a little overwhelmed. On to this month's topic. French polishing.
The art of French polishing is shrouded in much mystique and sometimes, especially in the past it was even guarded with secrecy. As I mentioned in an earlier post. I was late to the whole varnish finish revival. I am by nature quite skeptical and I was heavily invested in my lacquer finishes, both in time to acquire the skills and in the spray equipment. When I finally turned my attention to investigating the claims that people were making about "varnish" finishes, I was quite surprised to find that there are much better finishes than lacquer in terms of sound and also neck feel. The first mandolin that I completed after teaching myself the art of French polishing was noticeably more "open" in it's sound. I knew in an instant that I could never go back to lacquer if I wanted to stay committed to pursuing the highest level of tonal excellence.
This revelation, by necessity, opened up a whole new area of research, experimentation and the acquisition of new skills. One big question that I now had was, which type of varnish or combinations of varnishes was the absolute best for sound quality? Finding the answer to that was a long road of researching varnish recipes and application techniques and then trying them out to hear the results. I tried various oil varnishes, French polish over oil and spirit vanish alone, applied by French polishing. No matter what I tried, I always came back to straight spirit varnish, applied by the French polish method. It's not that the other finishes produced bad results, Good results can be had from oil or even lacquer but the standout best for me was always a spirit varnish. In case you didn't know, the term spirit varnish refers to a finish that is dissolved in alcohol and dries by evaporation of same. Shellac is usually the main ingredient in spirit varnish but it can also be based on other natural resins or gums.
Spirit varnishes based on shellac are often modified with small amounts of other resins and gums such as sandarac, benzoin, mastic and copal. These additives can modify aspects of the shellac such as hardness/softness and toughness. Since it takes many hours spread over months and years to perfect a varnish recipe, many instrument builders, including myself, do not like to divulge the exact varnish recipe that they are using. Suffice it to say that I use a proprietary shellac based spirit varnish.
The other equally important aspect of finishing (perhaps even more so) is achieving a thin film thickness. This is where French polishing is unequaled. It must be understood that French polishing is a technique and not a particular varnish. It is a method of applying a finish in vapor thin layers that fuse with prior and subsequent layers and that can only be done with spirit varnishes.
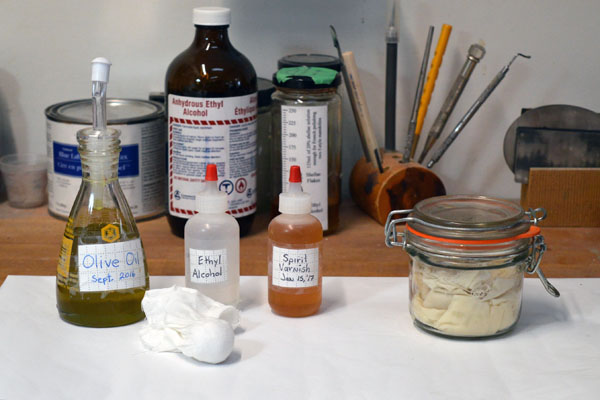
In it's simplest form, French polishing requires three things, spirit varnish, a little oil for lubrication and an applicator referred to variously as a fad, menuca, tampon or rubber. I use the term fad as it sounds the least offensive and no one giggles every time I say it.
Pictured above are basic materials used in French polishing.
A jar for storing the fad between "sessions", spirit varnish, alcohol, the fad and some oil.
The fad is made up of an absorbent wad of some natural fiber wrapped with cotton linen which is pulled tight to remove any wrinkles. I have tried various wadding materials like old (clean) wool socks, cotton batten and felt. My favorite at this time is diaper cloth. The wrapper can be made out of an old (white) cotton tee shirt or cotton linen. My preference is cotton "trace cloth".
To get started, the fad is loaded up with some spirit varnish. The amount of moistening is very critical and can only really be learned through experience. I think that one reason for the mystique around French polishing is that it can only be explained so far, the rest has to be gained through practice and experience. I keep some white paper handy to blot the loaded fad on so that I can see how much varnish it is depositing. You want the fad to leave a cluster of small splotches on the paper rather than a real wet spot. When the fad is properly loaded, a very small amount of oil is added. I make a small smear of oil on the back of my left hand to tap the loaded fad onto in order to pick up some oil. Shellac is extremely sticky and without the oil, you run the risk of having the fad stick to your finish and pulling off some of the film that you worked so hard to build up. Knowing exactly how much oil to add is again, a matter of experience but it is not much. Now your ready to French polish!
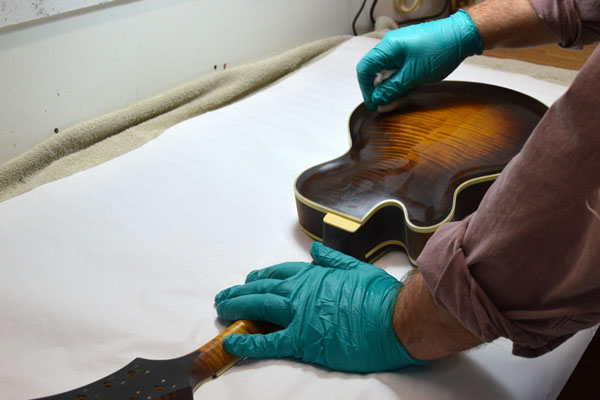
It is important to know that once the fad makes contact with the surface it must be kept in constant motion until it is raised off the surface. Some people describe the initial approach as like an airplane coming in for a landing. Once on the surface, the fad is kept moving in a variety of patterns such as circles and figure eights. When done, the fad is lifted off the surface like an airplane taking off. In French polishing, there are no "coats" as in spray finishing. Instead there are "sessions". The first sessions are often called "bodying" sessions as the fad is loaded with the full strength varnish solution and the idea is to build up a film thickness relatively quickly. As the sessions progress, more alcohol is added to the fad to thin out the varnish and create a beautiful, crystal clear, high gloss. When the fad is loaded properly, a very thin visible trail can be seen behind it while it moves around the surface. This trail, if of the proper dampness, will start evaporating almost immediately after it goes on. In this way, vapor thin layers of varnish are put down. The term layers is not quite right because the varnish will fuse to the existing finish and become an integral part of the overall film.
The first sessions of French polishing to build some thickness.
As the vanish is laid down, it does not dry fully and after some time the surface will become too soft to continue without doing more harm than good. This is when the mandolin is put away for sometimes hours and sometimes overnight. Again, experience is the guide. Because the mandolin is a relatively small object, the finish becomes soft fairly quickly after being repeatedly rubbed with the moist fad. The finish must be built up through many short sessions. Generally about 20 minutes each.
Here's the beauty of the French polish method. The gloss forms itself without any need for sanding and buffing out. That means that as soon as you have achieved a pleasing finish you are virtually done. In spray finishes, you must allow for sanding back the finish for final buffing. This means that extra "insurance coats" are sprayed in order that it can be safely sanded back with minimal risk of sanding through the finish and into the color coats and still have enough finish left for aggressive buffing out.This is why the French polish method can produce such a thin film. As soon as the finish becomes glossy, you are done so the least amount of material is needed. The depth and clarity of the spirit varnish is noticeably superior to any lacquer and therefore can create the illusion of a deep finish while in fact being very thin.
As the polishing progresses, more and more alcohol is added to the fad along with some varnish and less and less oil is used. (experience is the guide) until the surface is left with a crystal clear, yet glowing finish that is far superior in both beauty and tone than any factory applied spray finish. This is the advantage of the independent builder. Not concerned with shareholder profits or recouping investments in expensive machinery and tooling, the independent luthier can use only the best materials and methods to create an instrument of the highest possible level.
It is a true wonder to behold when after hours of hand rubbing
the superior depth of a French polish finish emerges!
Until next time, thanks for reading,
Oliver
© 2016 Apitius MandolinsAll Rights Reserved

 800 X 600.jpg)